CPU Unit
Printer Backup
Backups contain system configuration, user data and log files.
Some of the information is stored in temporary memory and is lost at power off.
When creating a backup it is important that the printer is kept power on between an issue happening and the backup.
See also How to create a backup or restore a backup from printer user interface.
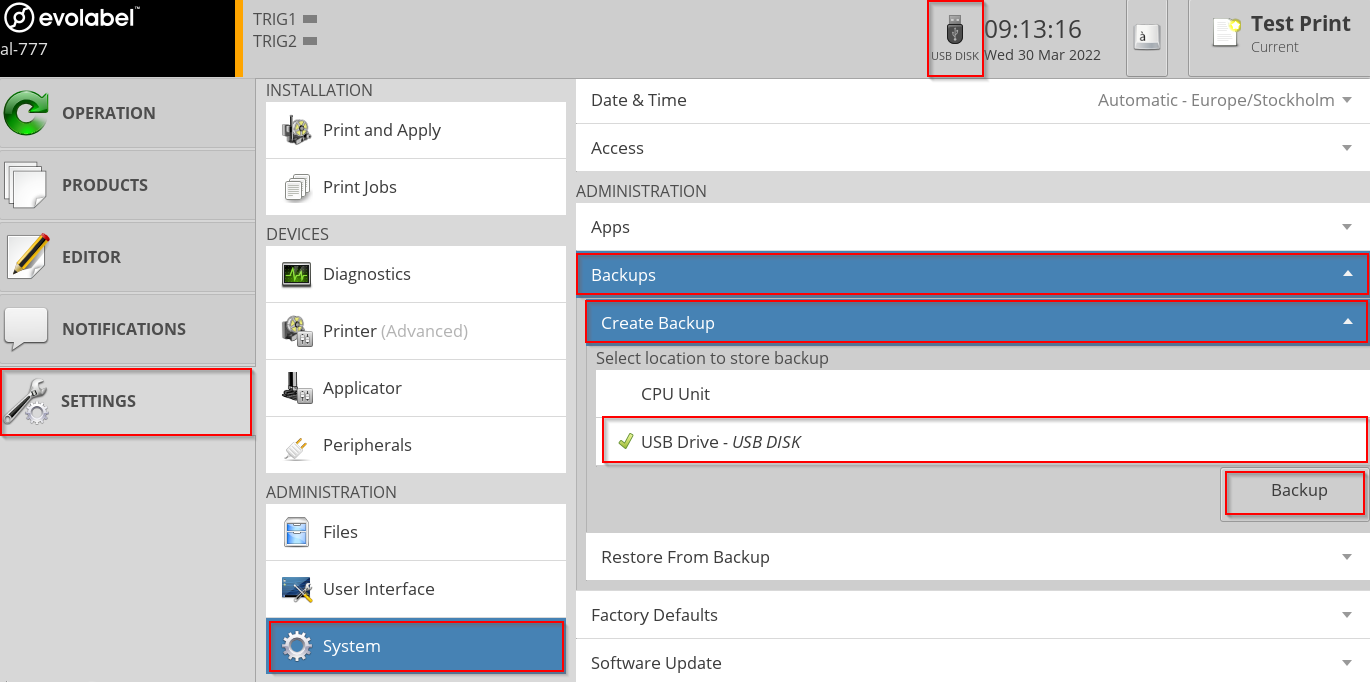
How to Store a Backup to a USB Memory Stick
- Log in to Service level (default 4113).
- Insert the USB memory stick into one the the printer’s USB ports.
- Wait for the USB icon to be displayed to the left of the printer clock.
- Navigate to .
- Select the USB Drive.
- Tap to start the backup.
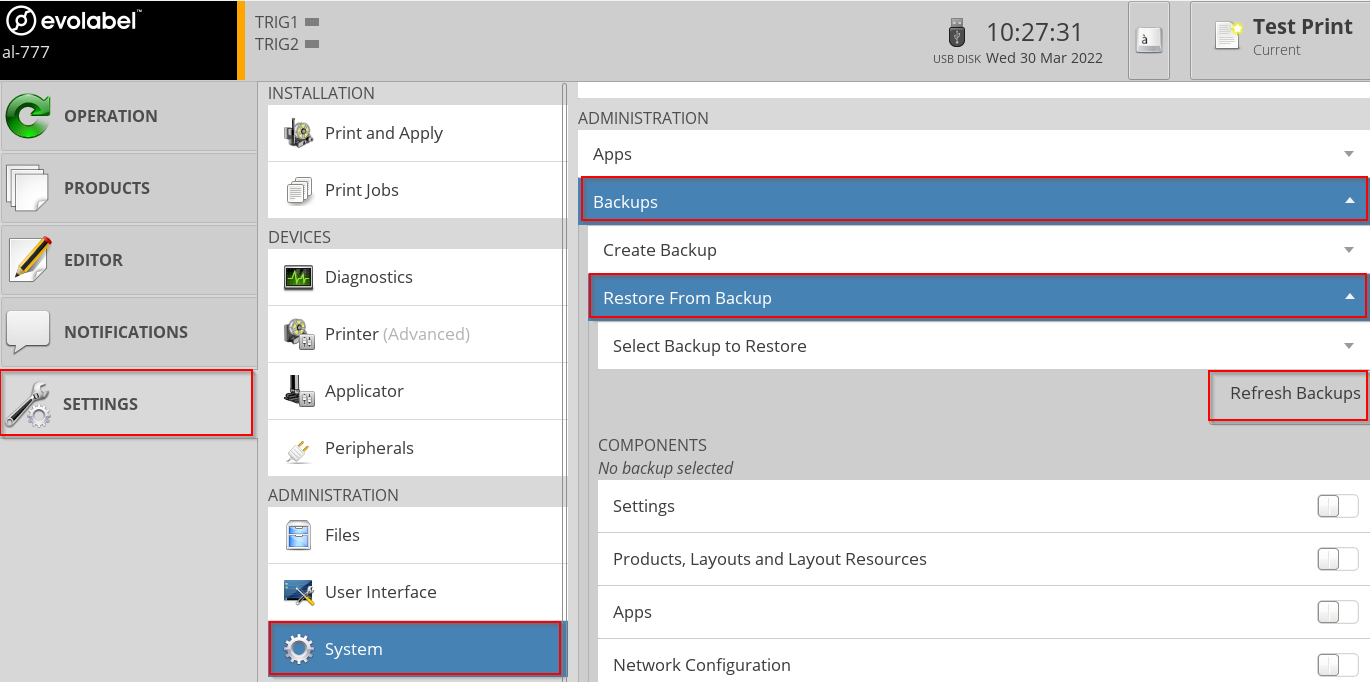
How to Restore a Backup from a USB Memory Stick
Log in to Service level (default 4113).
If the backup is on a USB memory stick, insert the USB memory stick into one the the printer’s USB ports and wait for the USB icon to be displayed
Navigate to
Tap
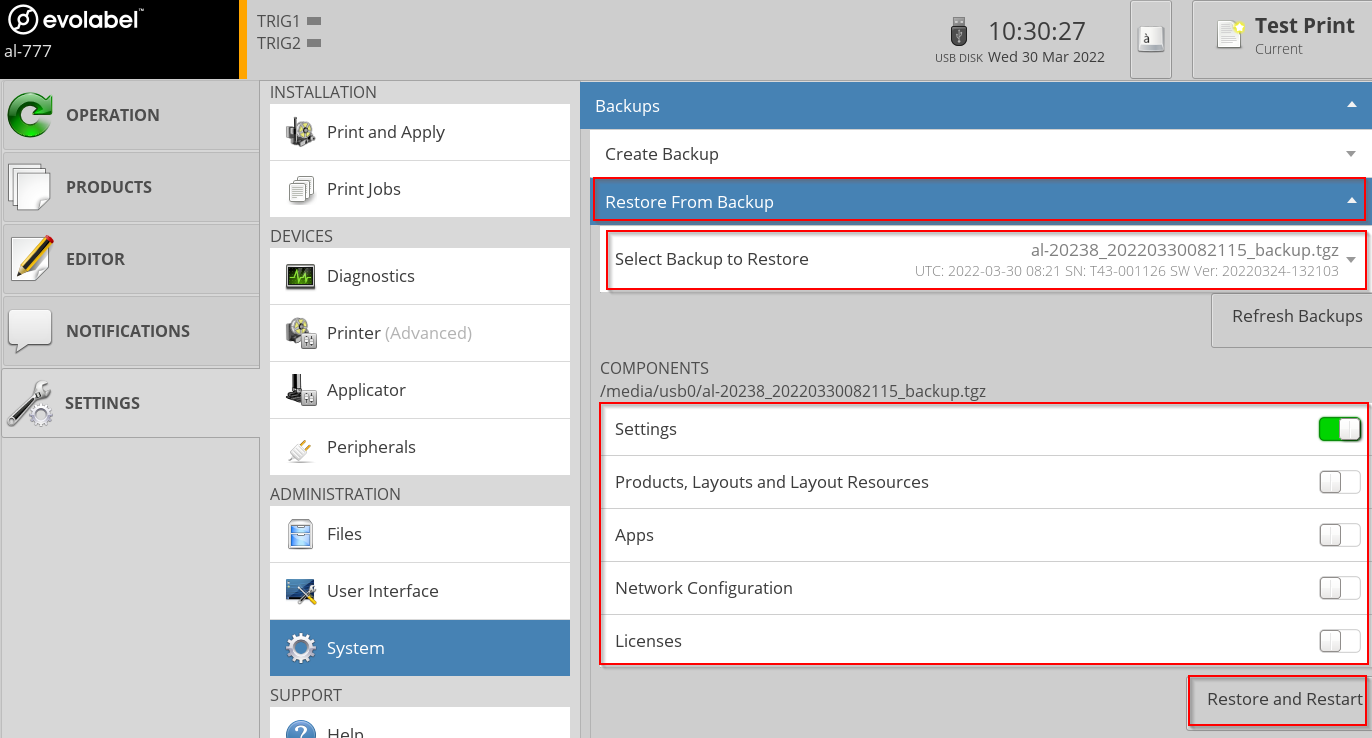
Unfold the menu “Select Backup to Restore” and select the backup to be restored.
Select at least one Component to restore
- Settings
Printer related settings. E.g. Printer model, applicator type- Products, Layouts, and Layout Resources
Product lists, layouts, fonts images etc.- Apps
Custom apps loaded to the printer- Network Configuration
How printer IP is assigned, DNS settings etc.
Normally only used when replacing a CPU box.- Licenses
Extra software licenses, e.g. printer High Speed mode.Tap
How to Store a Backup to the CPU and Download Using SFTP
- Store the Backup to the CPU
- Log in to Service level (default 4113).
- Navigate to .
- Select the CPU Unit.
- Tap to start the backup.
- Download the Backup Using SFTP
- Start your SFTP program, see guidance here
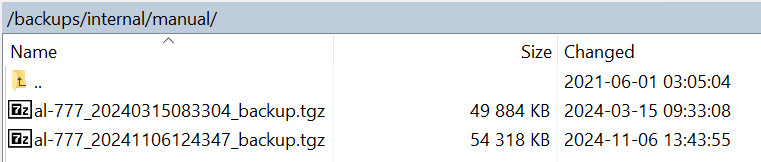
- The backups are stored at
- Download the backup with the correct time stamp.
Factory Defaults
Factory Default is a restore point that should be created when the system is setup and operates without any issue. Restore to the Factory Default during fault finding to put the system in a known good state.
Before Factory Defaults can be stored, the printer serial number must be entered. The serial number must consist of the printer model plus the serial number on the machine sign, padded to six digits with leading zeroes. Example: T63-000335.
See also How to create Factory Defaults or restore to Factory Defaults from printer user interface.
Software Update
See also Software Update from the printer user interface.
Printer with Internet Connection
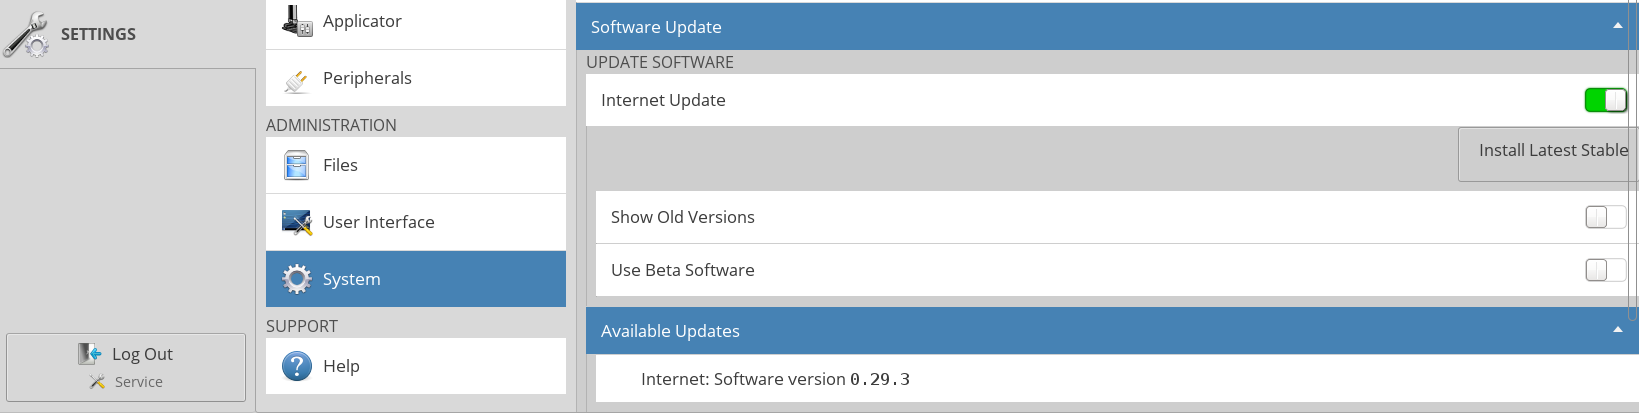
When is enabled, the system contacts Evolabel® upgrade servers and adds them to the Available Updates list.
- Show Old Versions
- When enabled, all available versions are listed. By default only the latest version is displayed.
- Use Beta Software
- When enabled, version with experimental features are displayed.
- Available Updates
- When expanding this item, the system scans for available updates.
- Log in to Service level (default 4113).
- Enable Internet Update.
- Select if Beta Software and Old Versions should be listed.
- Open “Available Updates” section.
- Select the update to be installed.
- Press Install Selected Software to start the installation.
- At the end of the installation you need to select if the software should be restarted or printer should be rebooted. It is a good practice to reboot the printer after a software change.
Offline Software Update
- Log in to Service level (default 4113).
- Go to the Firmware Change Log to find the software version needed.
Use the download link to download the version. A .run file is downloaded. - Copy the file to the root of a USB memory.
- Install the USB memory in printer.
- Wait for the USB icon to be displayed.
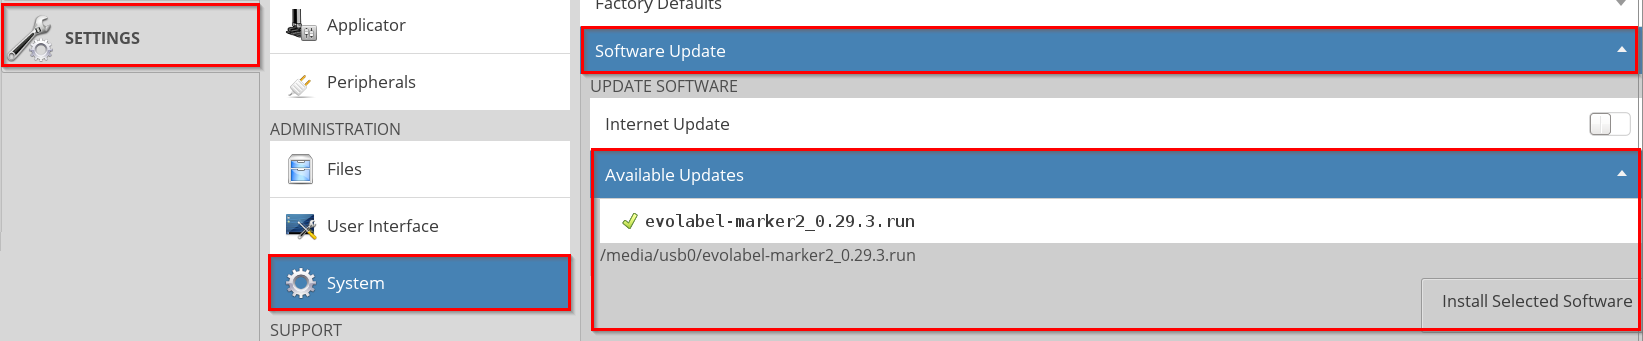
- Navigate to .
- Deselect Internet Update.
- Open “Available Updates” section.
- Select the update.
- Press Install Selected Software to start the installation.
- At the end of the installation you need to select if the software should be restarted or printer should be rebooted. It is a good practice to reboot the printer after a software change.
- Remove the USB memory.
Upgrade and downgrade between software G1 and G2
- How do I upgrade from G1 to G2 software?
- How do I reinstall a CPU Unit G3 Plus Edition system?
- How do I downgrade to G1?
How to Replace a CPU Unit
When replacing a CPU unit, it’s extremely important that the printer is powered off. Always remove the power plug from the printer before starting to replace the CPU Unit.
Removing a CPU Unit when the printer is powered on is likely to lead to irreparable (out of warranty) damages to the CPU Unit. It also exposes you to a live current.
- General Instructions
- If the CPU unit to be replaced is still operational it is a good idea to take a backup.
- Turn off the printer on the power switch
- Remove the power cable from the printer
- Remove the back and front covers
- Remove all cabling from the CPU unit
- Remove the CPU unit, See mounting details below
- Install the new CPU unit
- Reinstall all cabling from the CPU unit
- Replace the back and front covers
- Replace the printer power cable
- Turn on the power switch to start the printer.
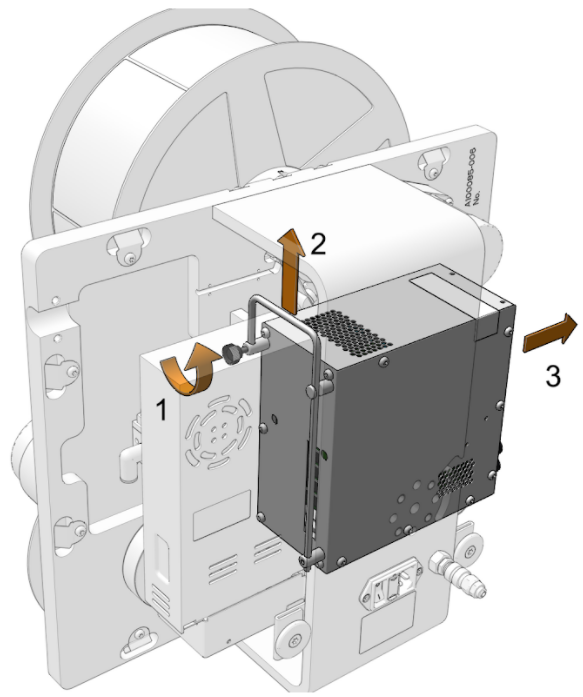
Mounting Details
CPU G3-SE and G3-PE
- To dock the CPU unit in the printer, align its position through the guiding pin and through the data bus connector.
- Push in until it bottoms against the plate.
For printers delivered with the new Power supply (introduced 2020 Q4) a magnet aids to maintain the CPU unit in position until the two fixing screws are tightened. This will aid situations where the orientation of the printer align the CPU unit downwards. - Use a T25 torx (preferably with about 9cm long shaft) to tighten the two screws (b) that are reached from the back / rear side of the printer next to the power supply.