QuickTamp with Distance Sensor
This tutorial describes the basic steps of how to setup a Distance Sensor to be used with a QuickTamp applicator. See the QuickTamp manual for information of how to configure the applicator.
Physical Installation
Printer
The printer shall be mounted above the conveyor belt.
Distance Sensor
Connect the Distance Sensor to EXT3 on the CPU.
In most cases, the Distance Sensor is only used to measure the product height. The height is measured when the product is at the product trig position (TRIG1). This means that the Distance Sensor must be located before the trig position. A distance of 50mm is recommended.
Setup
Setup printer and trigger sensor as normal.
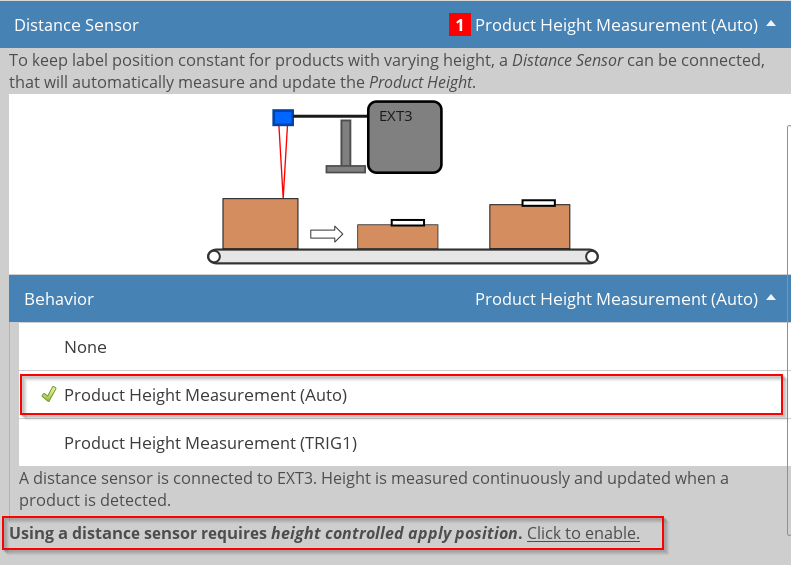
- Enable the Distance Sensor
- Open
- Set to Product Height Measurement (Auto).
- Click “Using a distance sensor requires … Click to enable”.
This is enables Apply Position as Product Height on the Applicator page.
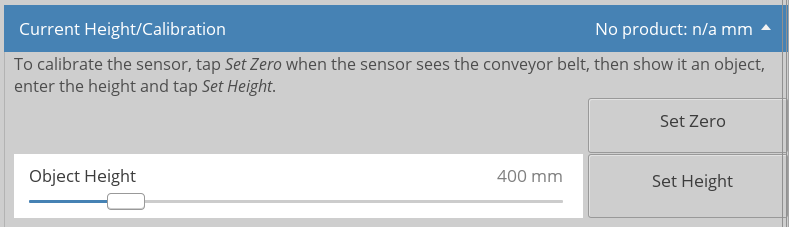
- Calibrate the Distance Sensor
- Press for the sensor to measure the distance to the conveyor belt.
- Place a box that is 200-400 mm height on the conveyor belt below the distance sensor.
Measure the exact height and enter as Object Height. - Press to give the sensor another reference.
- Place an object of a different height below the distance sensor.
Verify that the height is measured correctly.
The product height is displayed in the header of the Current Height/Calibration box.
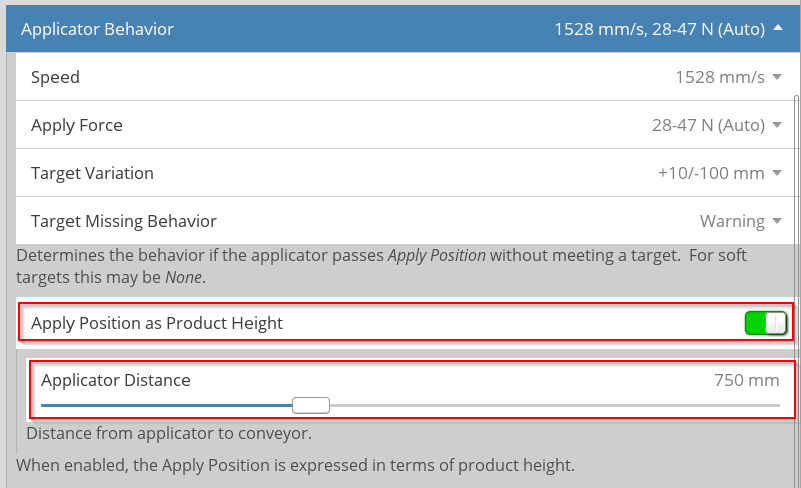
- Applicator setup
- Open
- Ensure that Apply Position as Product Height is enabled
- Set the Applicator Distance.
Enter the distance is from applicator to the conveyor belt.